
Email signatures are an integral part of professional digital communication, serving not just as a formality, but as a powerful tool to convey essential contact information, showcase your brand, and even provide a glimpse of your professional identity. With most business communications happening over email, a well-crafted signature can set the tone for a conversation and leave a lasting impression on your correspondents.
Outlook 365 provides a comprehensive suite of platforms to manage your emails effectively, be it through the desktop app, web version, or on mobile devices. This article focuses on how to add signature in Outlook 365 with a particular emphasis on the desktop version, guiding you through the process to ensure your outgoing emails reflect your professionalism consistently.
Why Use a Signature in Outlook 365?
An email signature is more than just an ending note; it’s a branding tool. It ensures that every message you send out represents your brand consistently, solidifying a professional image in the eyes of your recipients. The outlook signature setup makes it easy to include all the crucial information you want to share, such as your name, position, contact details, and even your company’s logo. By making use of hyperlinks, you can also direct recipients toward your professional social media profiles, websites, or portfolios.
Creating a Signature in Outlook 365 Desktop:
To add a signature in Outlook 365 desktop, you will need to navigate through a series of menu options.
- Open the Outlook 365 application.
- Click on ‘File’ to access the Account Information page.
- Go to ‘Options’ and select ‘Mail’ from the navigation pane to find the Outlook signature settings.
- In the Mail category, click on ‘Signatures…’ to open the signatures outlook setup window.
Here’s where you’ll craft your signature:
- Click ‘New,’ type in a name for your signature, and hit ‘OK.’
- In the Edit Signature Box, you can start typing your signature as you want it to appear.
- Use the formatting toolbar for stylizing your text with bold, italics, font changes, and colors.

- Incorporate hyperlinks for your website or social media channels by clicking the hyperlink icon.
- Navigate to the ‘Choose default signature’ section to set this signature for new messages or replies/forwards.
- Once you’re satisfied with your signature, click ‘Save’ to apply the changes.
Tips for creating an effective signature:
- Keep it concise; include your name, title, company, and contact information.
- Align with your company’s branding through logos, brand colors, and fonts.
- Hyperlink to your professional social media profiles, company website, or portfolio.
- Ensure readability with a simple, professional font, and avoid complex graphics that might not align across different email clients.
Adding a Signature in Outlook 365 Web App:
To set up Outlook 365 signature in the web app version, you’ll follow slightly different steps:
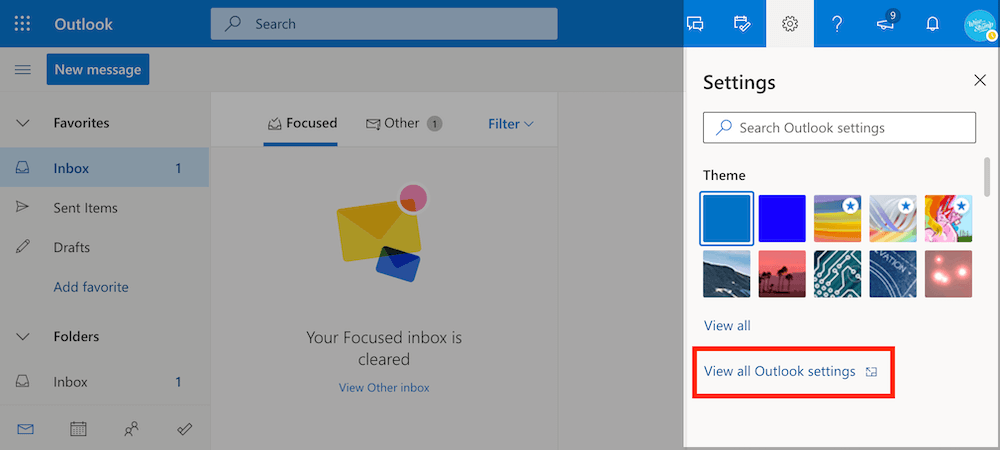
- Log into your Outlook 365 account and click the gear icon for ‘Settings.
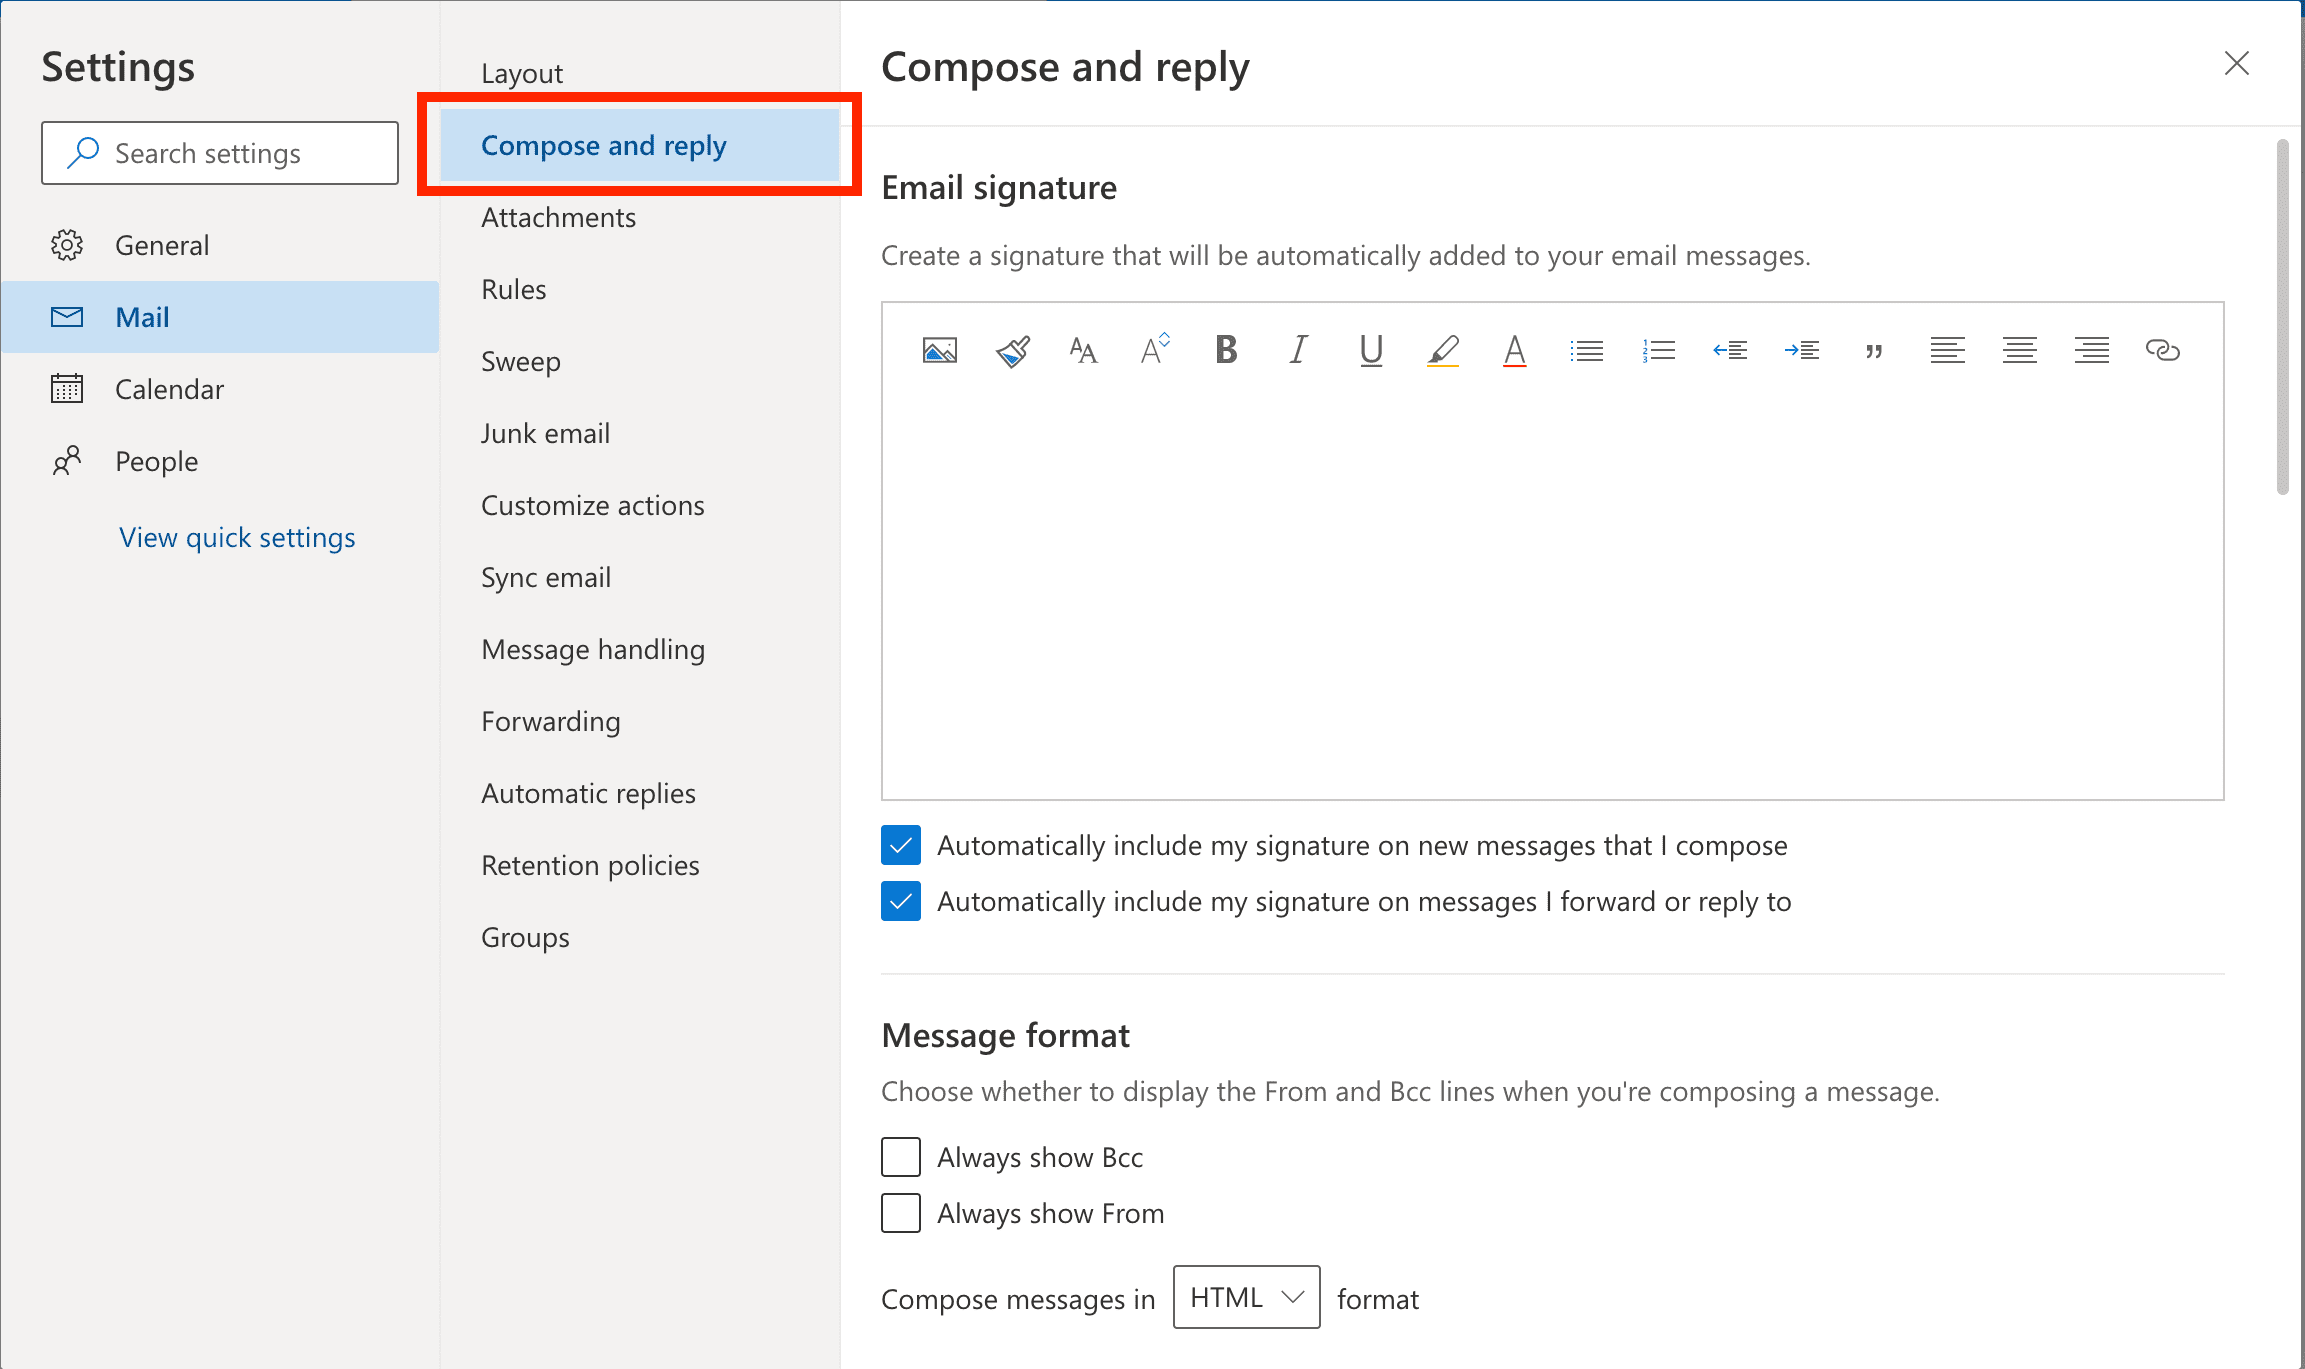
- In the search box, type “signature” and select the ‘Email signature’ result.
- A text box will appear where you can type and format your signature.
- Once finished, click ‘Save’ to retain your signature settings.
Using Different Signatures for Different Accounts:
For those with multiple email accounts within Outlook 365, managing different signatures is essential. You can create several signatures within the Signatures and Stationery dialog by clicking ‘New’ for each one and assigning them to the respective email accounts. This feature helps maintain appropriate branding across different facets of your work or business.
Troubleshooting Common Issues:
Sometimes, Outlook 365 signature issues arise, such as missing signatures or formatting setbacks. These hiccups can usually be resolved by:
- Double-checking that you’ve set the signature to automatically add to new messages or replies. If not, you can manually insert a signature by clicking ‘Insert’ > ‘Signature’ in a new email message.
- If the formatting looks off, ensure that the email format is set to HTML, as plain text does not support certain formatting styles.
- For persistent issues, the Microsoft Support website provides an extensive knowledge base, or you can reach out to Outlook support for assistance.
Conclusion:
In closing, setting up a signature in Outlook 365 is a process that offers significant benefits, enhancing your communication with a professional touch. By following the instructions above, you can create a personalized outlook signature that reflects your brand and provides recipients with all the necessary information to remain connected. Whether you prefer the desktop version or you’re more inclined to use the web app, customizing your signature is a step towards maintaining a high standard of professionalism in your email correspondence.